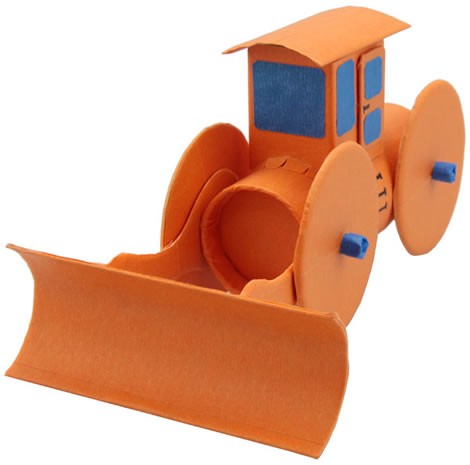
Dozer
Getting started
Always use your imagination and be creative when building these kids crafts or any others. It's your creation, so be inventive when looking for building supplies — you just may be surprised!
When building your project, experiment with new and different ways of putting it together. The most important thing is to
have fun!
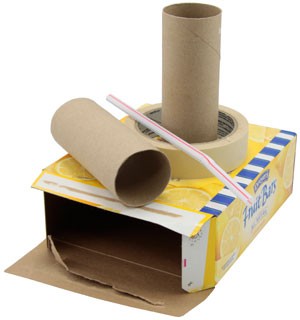
Find these or similar supplies!
• 2 toilet-paper tubes
• Cereal box or some cardboard
• 1 or 2 straws
• Tape
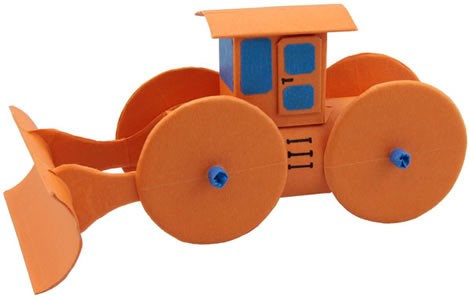
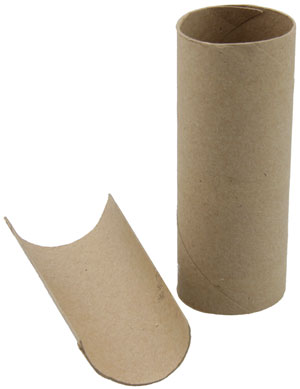
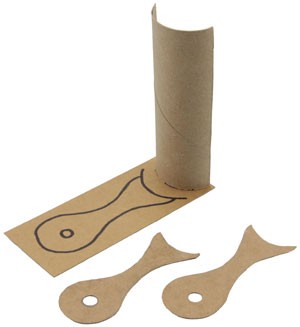
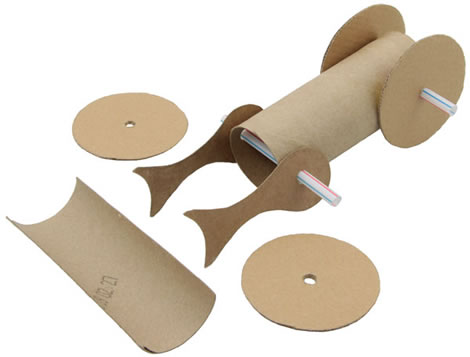
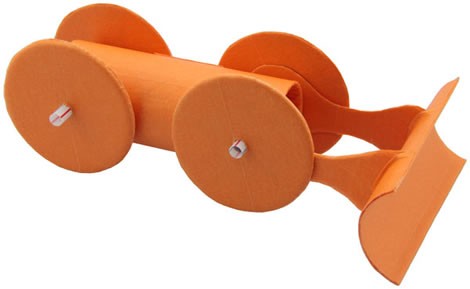
1. Make your bulldozer blade!
I started out by making my bulldozer blade. Simply cut one of your TP tubes in half the long way. I ended up cutting it down a little more so that it was about 1/3. Looks like a bulldozer blade to me! You can even cut the edges at an angle a little bit to make it even more cool.
2. Make your bulldozer arms!
Next you can make the arms that will hold your bulldozer blade. Stand your blade up on to a piece of cardboard and trace out its circular profile. Then draw out your arm design. Make it about three to four inches long. Cut it out and trace it onto another piece of cardboard. Then cut that one out. This way both of your arms will be the same. Next make a hole on each arm so that they can slide freely onto your axle straw.
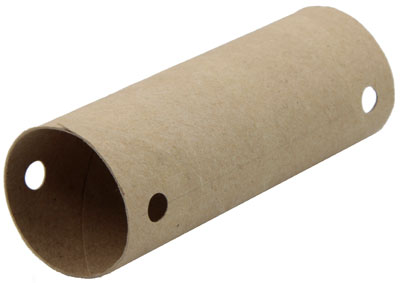
3. Add the axle holes!
Now make four holes onto your other TP tube. You will want to make them as level to each other and as evenly spaced as possible. I spent a few moments with a ruler and marked my locations out first. Then using a hole punch I carefully made my holes. These holes need to be slightly bigger than your straws.
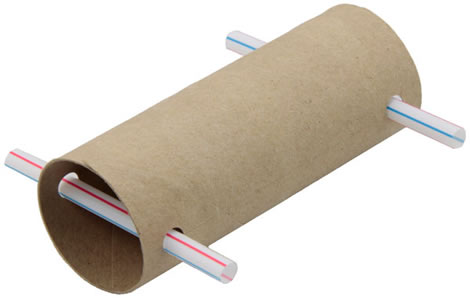
4. Add your axles!
For my axles I cut out pieces of two straws so that they stuck out about an inch on each side. I inserted them and then made a few adjustments to my holes. Basically, I made the holes a little bigger so that my straws would turn freely.
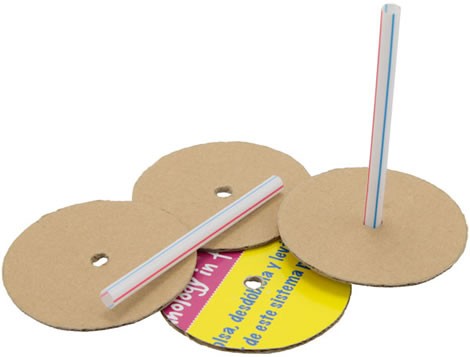
5. Make your wheels!
Take an old box or piece of cardboard and draw four circles (I made my wheels about three inches in diameter). Then carefully cut out all four wheels. Find the center of each wheel and make a small hole for your straw axle to slide through. Try not to make the holes too big, or the wheels might wobble.
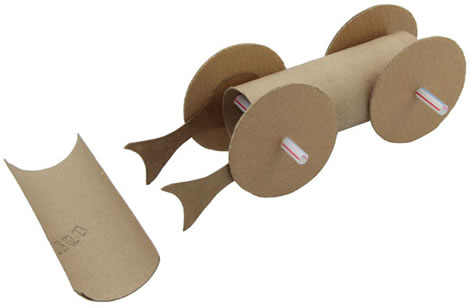
6. Start to assemble your dozer!
Start to assemble your bulldozer by installing the back axle straw then slide your rear wheels onto it. You may want to add a little tape to hold your wheels on it if they're loose. Then place your front axle straw in and slide both of your bulldozer arm onto it, one on each side.
7. Add your wheels!
Now install your front wheels. At this point I rolled my dozer around a little and then made a few last-minute adjustments. Before you tape it up permanently make sure your wheels can turn and that the blade arms are loose. If not, make the necessary adjustments.
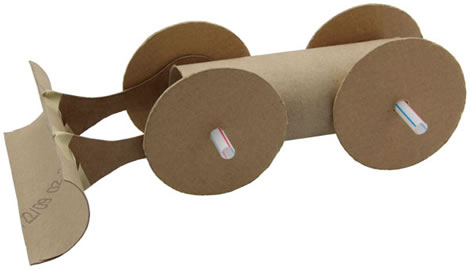
8. Attach your blade!
All that's left is to attach your front bulldozer blade to both of the arms. Find a position that you like and tape it on. VOILÀ - a TP Bulldozer! You can start rolling it around or dress it up. The sky's the limit!
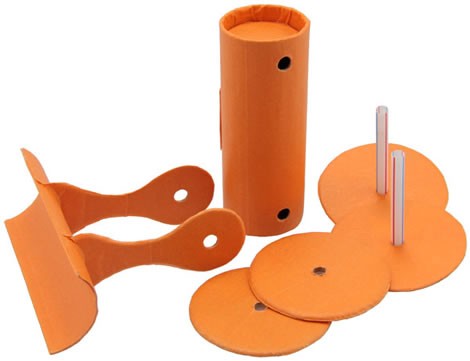
9. Dress up your dozer!
Now for my favorite part of every project...dressing it up! For my TP Dozer I used some orange masking tape. If you don't have or can't get some orange tape, try using regular masking tape and coloring it with a permanent maker. I disassembled all the pieces and carefully covered everything with my orange tape after I made the Simple PT Dozer.
10. Reassemble your dozer!
After I was happy with the way all off my parts looked, I reassembled my TP Dozer. It looks really cool but it still needed something. My son suggested a cabin... I agree!
11. Build your cabin!
For my cabin I carefully cut out four pieces of cardboard to form its four sides. I decide to take the scrap piece of TP tube that was left over from making my Dozer blade and use it for the roof. After playing around a little with its shape a little, and making some necessary adjustments to it, I permanently taped it up and covered it with my orange tape.
12. Make your windows!
To make
the windows for my cabin I carefully cut them out of some blue masking
tape. You could draw them using a colored marker if you like. For my
door, I cut out a piece of scrap cardboard and covered it with tape. I
added some windows and drew in a little handle and attached it to the
cabin. LOOKS REALY COOL!
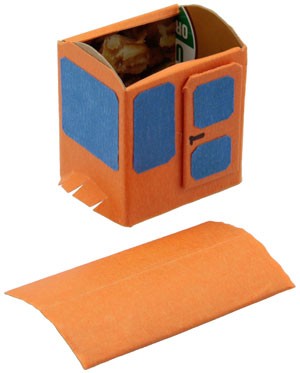
13. Add extras!
I taped the cabin on, drew in a few steps so that the dozer operator would be able to climb up to the cabin. I also added a little blue tape to the ends of my axle straws for the finishing touch and Voila! Your TP Dozer is ready to start bulldozing stuff around the house!