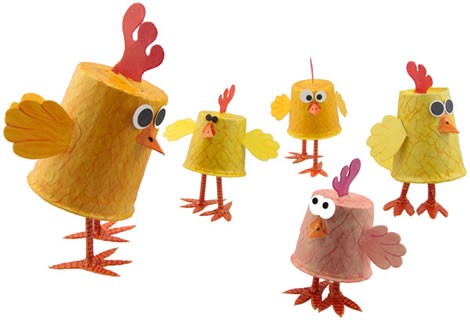
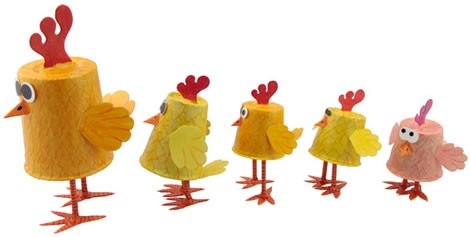
Chickens
Getting started
Always use your imagination and be creative when building these kids crafts or any others. It's your creation, so be inventive when looking for building supplies — you just may be surprised! When building your project, experiment with new and different ways of putting it together. The most important thing is to have fun.
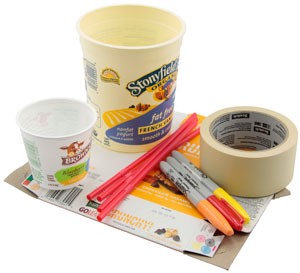
Find these or similar supplies!
• Plastic or paper cups (big or small)
• Masking tape
• Straws
• Some old cardboard or construction paper
• Markers or pens for customizing
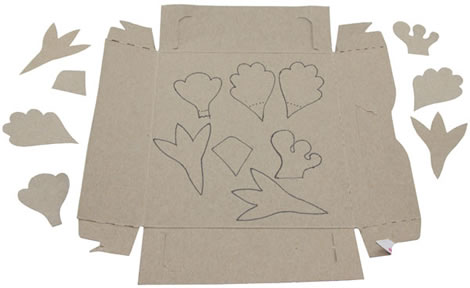
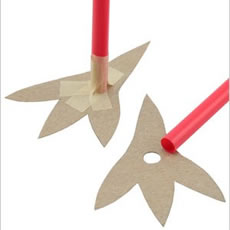
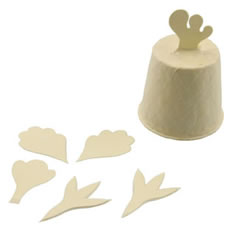
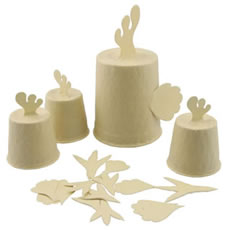
1. Cut out the parts!
To get started making your chicken you will need to draw and cut out its feet, beak, wings, tail and comb (that's the red thing on top of a chickens head). I used an old cereal box for this. You can make your chickens look any way you want, maybe with huge feet or tiny wings. Have fun!
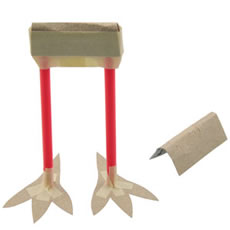
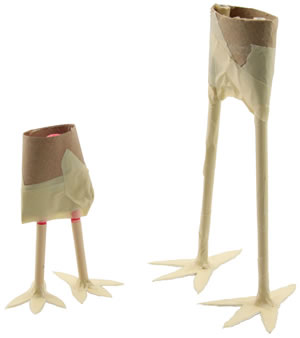
2. Make feet!
The next step is to make your chicken's legs and feet. Attach the feet the straw legs. I punched a hole in my feet first to make the feet more stable. Now take a piece of cardboard and fold it over both straws to secure them in place. Play around with how you want the legs to look. Do you want long or short legs? Splayed feet or pigeon toes?
 |  |
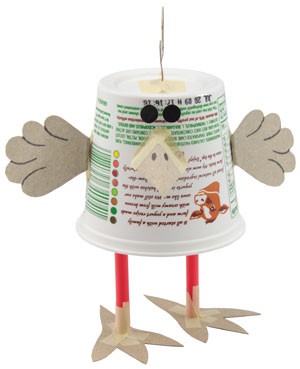
3. Tape on your body parts!
Now you can tape on your wings, beak, tail and comb. I had lots of fun putting the beak high and low, and seeing how the wings looked open or closed. You can add lots of character with your choice of placement.
The final step is the eyes! These are the most important part of the chicken! You can really do all kinds of fun things with the eyes. We have tried big eyes, little eyes, googly eyes, and crazy eyes. Just cut out the shapes you want and go wild! The simple chicken is fun and very easy!, From here you could paint or color your chicken any way you want and be finished.
4. Ready for the fancy version?
Now for the fancy version! We started out covering everything in a base layer of masking tape. This adds lots of texture to the project and covers the labels from the cups.

5. Add tape layers!
Next we layered lots of torn pieces of tape on the body of our chickens to give them a feathered look. We then covered all the body parts in tape, making them easier to color on later.
 |  |
6. Make your legs!
The legs are made the same as the simple version. We also covered the straw legs in tape to make them look more realistic.
7. Decorate your chickens!
The final step is the most fun... Decorating! We colored all of our chickens with permanent markers, then put on our goofy eyes last. You can make your chicken any color you want, so get creative and customize it! Voila! A Dixie Chicken!
Vogue, Strike a Pose!