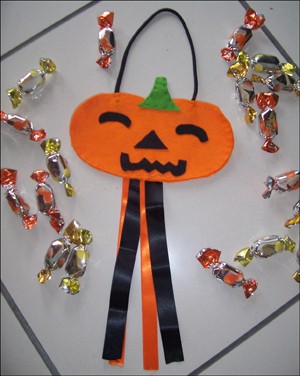
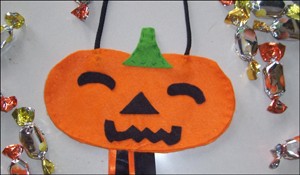
Trick or Treat Candy Bag
Be ready to go trick or treating for Halloween and make your own candy basket! It's mor fuen and very easy with this Hellokids craft tutoring for young kids.
To do so you need:
- orange, green and black lightweight fel
- scissors
- glue
- orange, green and black sewing thread
- sewing needle
- black button-hole twist
- black and orange satin binding
- white chalk
- tracing paper
- lead pencil
You have two options: Make a small bag (that must mean you don't like candies too much!!!!) or make a big bag (to collect sweets for you, your brothers and sisters)
Create your Trick or Treat small bag
- A square of orange lightweight felt of 0.70 ft aside
- A square of green lightweight felt of 0.10 ft aside
- A band of black lightweight felt of 0.15 ft
- satin binding 0.70 ft long
- button-hole twist
print out a small pumpkin pattern!
Make a big trick or treat bag
- A square of orange lightweight felt of 1.5 ft aside
- A square of green lightweight felt of 0.20 ft aside
- A band of black lightweight felt of 0.40 ft
- satin binding 1.5 ft long
- black button-hole twist 1.0 ft long
print out a big pumpkin pattern!
Print out the pumpkin pattern, then cut it up. Fold the square of the orange lightweight felt in two (you can fix it with a paper clip).
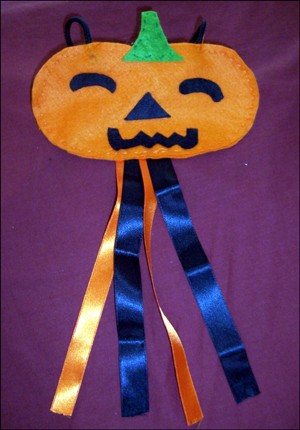
Put the pumpkin pattern on the felt then draw outlines with the white chalk. Cut it along the line. You have two faces of the pumpkin.Cut up patterns of the pumpkin the mouth, nose and the eyes.
Put them on the black lightweight then draw outlines with the white chalk.Cut it along the line. Stick them on the pumpkin face.
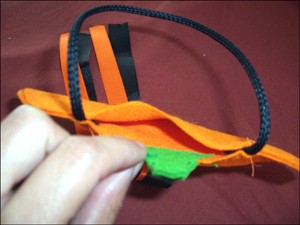
Cut up pattern of the pumpkin stalk. Fold the square of the green lightweight felt in two. Put the stalk pattern on it, draw outlines and cut it up. Sew both pieces together with a green thread.Stick the extremities of the black button-hole twist on the pumpkin face.
Alternate colored satin bindings. Place them at the back face of the pumpkin then fix them with the orange thread.
Now you're ready to go trick-or-treating! You have a nice bag to collect candies and chocolates.